In today’s fast-moving restaurant industry, speed + presentation = sales. Customers don’t want to wait for physical menus—and owners don’t want to reprint them every time prices change.
That’s where QR code menus (digital menus) come in.
As someone who approaches design with a Pentagram-level thinking mindset—clarity, usability, and visual persuasion— this guide will show you not just how to create a QR code menu, but how to make it convert customers into orders.
What is a QR Code Menu?
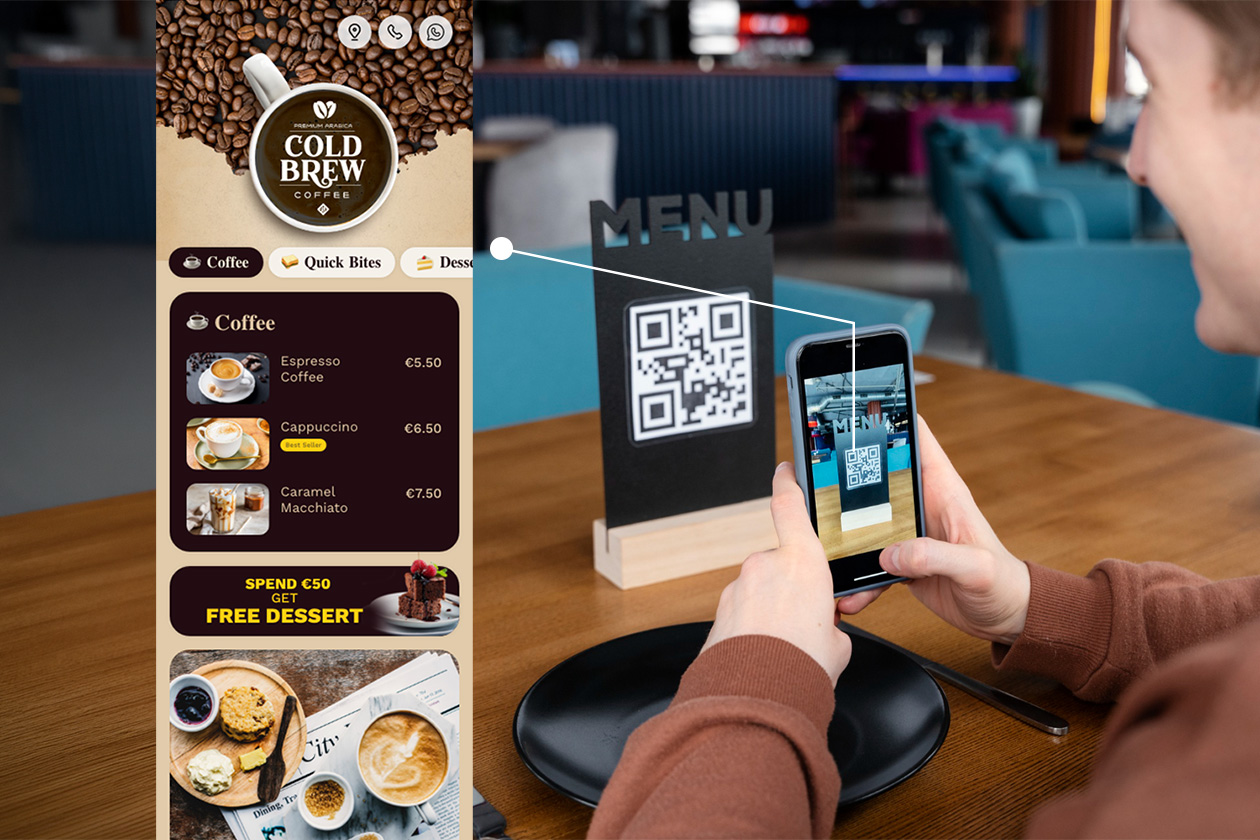
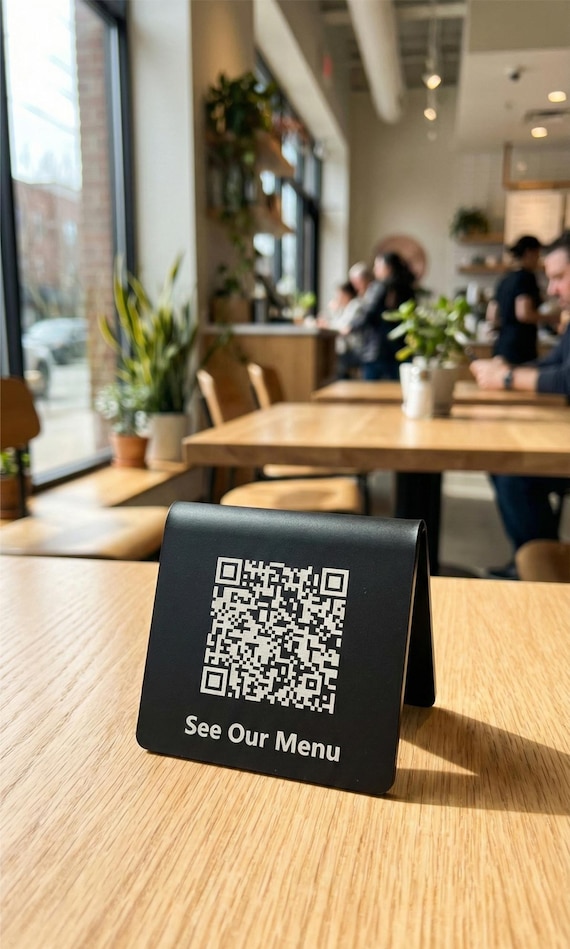
A QR code menu is a digital version of your restaurant menu that customers can access by scanning a QR code using their phone.
Instead of handing over a printed menu, you simply place a QR code on tables, standees, or walls.
Why Restaurants Are Switching to Digital Menus


Key Benefits:
- ✅ No reprinting cost
- ✅ Contactless & hygienic
- ✅ Easy to update prices anytime
- ✅ Add offers & upsell items
- ✅ Boost customer engagement
The Real Problem: Creating a Menu Takes Too Much Time
Most restaurant owners struggle with this:
“Typing the entire menu manually is frustrating and time-consuming.”
And that’s true.
If your menu has 50–100 items, manually entering everything into a system can take 2–4 hours.
Solution: AI Menu Scanner 🚀
Now, instead of typing everything, you can:
- Scan your existing paper menu
- Automatically convert it into a digital menu
- Edit & publish instantly
This is a game changer for small and medium restaurants.
Step-by-Step: How to Create a QR Code Menu
Step 1: Scan Your Existing Menu (AI Powered)

- Upload or scan your printed menu
- AI automatically detects:
- Item names
- Prices
- Categories
👉 No manual typing needed
Step 2: Customize Your Digital Menu Design
This is where design matters most.
A well-designed menu increases hunger and order value.
Add:
- 🍔 High-quality food images (craving-based visuals)
- 🎨 Brand colors & fonts
- 🧾 Categories (Starters, Main Course, Combos)
- 🔥 Highlight bestsellers
Step 3: Add Smart Features That Increase Orders
Don’t just create a menu—create a sales machine.
Must-have features:
- 💰 Special Offers & Combos
- ⭐ Google Review Link (increase ratings)
- 📍 Location Map Integration
- 📲 WhatsApp Order Button
- 🪑 Table-wise QR Codes (track table orders)
Step 4: Generate & Download QR Code
- Generate your QR code instantly
- Download in high quality
- Print on:
- Table standees
- Wall posters
- Bills / packaging
Step 5: Place QR Codes Strategically
Placement = more scans = more orders
Best places:
- On every table
- Entrance area
- Billing counter
- Takeaway packaging
Pro Tips (From a Design Agency Perspective)
1. Use “Craving Images” 🤤
Don’t just show food—make it irresistible
- Close-up shots
- Warm lighting
- High contrast
2. Reduce Decision Friction
- Highlight “Best Sellers”
- Use tags like: Most Ordered, Chef Special
3. Keep It Fast
- Menu should load in under 3 seconds
- Avoid heavy images
4. Mobile-First Design
90% users view menus on mobile
👉 Design vertically, not like a PDF
Final Thoughts
A QR code menu is no longer optional—it’s a growth tool.
With AI scanning, smart features, and good design:
👉 You can create your menu in 10 minutes instead of hours
👉 Increase sales by 20–30%
👉 Improve customer experience instantly
Want to Create Your QR Menu in 10 Minutes?
Skip the manual work.
- Scan your menu
- Add offers
- Generate QR
- Start getting orders
Your restaurant deserves a smarter menu. 🚀
Leave a Reply